Installing Tactile Ground Surface Indicators (TGSI) quick guide
By Warren Lloyd and Axel Downard-Wilke
Installing Tactile Ground Surface Indicators (TGSI) well is easy to get right and easy to get wrong.
When combined with other environmental information, TGSI assist people who are blind or have low vision with their orientation and awareness of impending obstacles, hazards, and changes in their direction of travel.
The RTS14 guidance says they should be used appropriately and not overused.
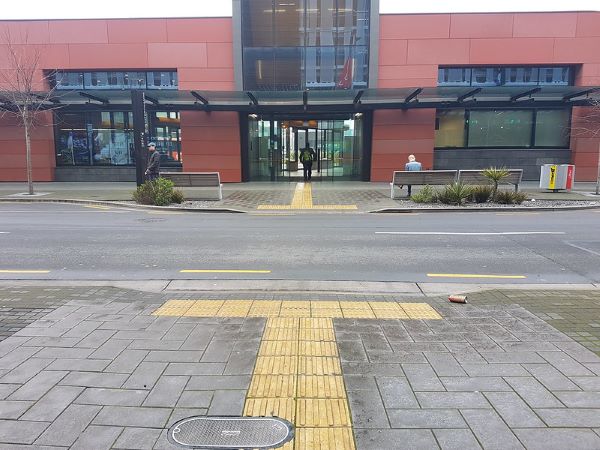
We only have two types, directional and warning TGSIs.
The poor layouts found during safety auditing are usually a result of TGSI being squeezed into a confined space. For traffic signals and road crossings, the best way forward is to design your TGSIs first – not last.
• Ensure your TGSI colour contrasts with your pavement and are not slippery.
• Put two rows of warning TGSI 300 mm from the kerb, across the full width of the cutdown.
• Put two rows of directional TGSI in the centre of the crossing or leading to the traffic signal call button.
• Develop any radius between the warning TGSI required for the intersection.
• Keep the radius tight as practicable ensuring full height kerb between crosswalks.
Consult with your local vision impaired road user group/s to make sure they are informed and comfortable with TGSI layouts.
And if you have infrastructure for people cycling at the intersection, ensure that any kerb ramps to or from the cycleway have green TGSIs. Those aren’t for low-vision cyclists, but for pedestrians who might get lost and could walk out onto the road at the cycleway cutdown. A common mistake that we find at dual crossings is a gap between the yellow and green TGSIs that is wide enough for a vision-impaired person to walk through. Simply avoid those gaps.
For more information refer to RTS 14 - Guidelines for facilities for blind and vision impaired pedestrians link